Quick Start
Drag & Connect
The basic operations of the CityFlow platform mainly rely on mouse dragging and connecting:
- Add a module: Drag a module from the left module list to the main interface using the left mouse button.
- Connect two modules: Hold the left mouse button from the output of a module and drag the connection line to the input of the next module.
- Move a module: Hold the left mouse button on the module's title bar and drag.
- Delete a module: Click the
removeicon in the upper right corner of the module. - Copy a module: Right-click on the module and select
COPY. - Paste a module: Right-click on the module and select
PASTE. Supports copying and pasting modules from another browser page. - Save a module: Right-click on the module and select
SAVE, or click the '+' button in the code editor interface and choose to save.
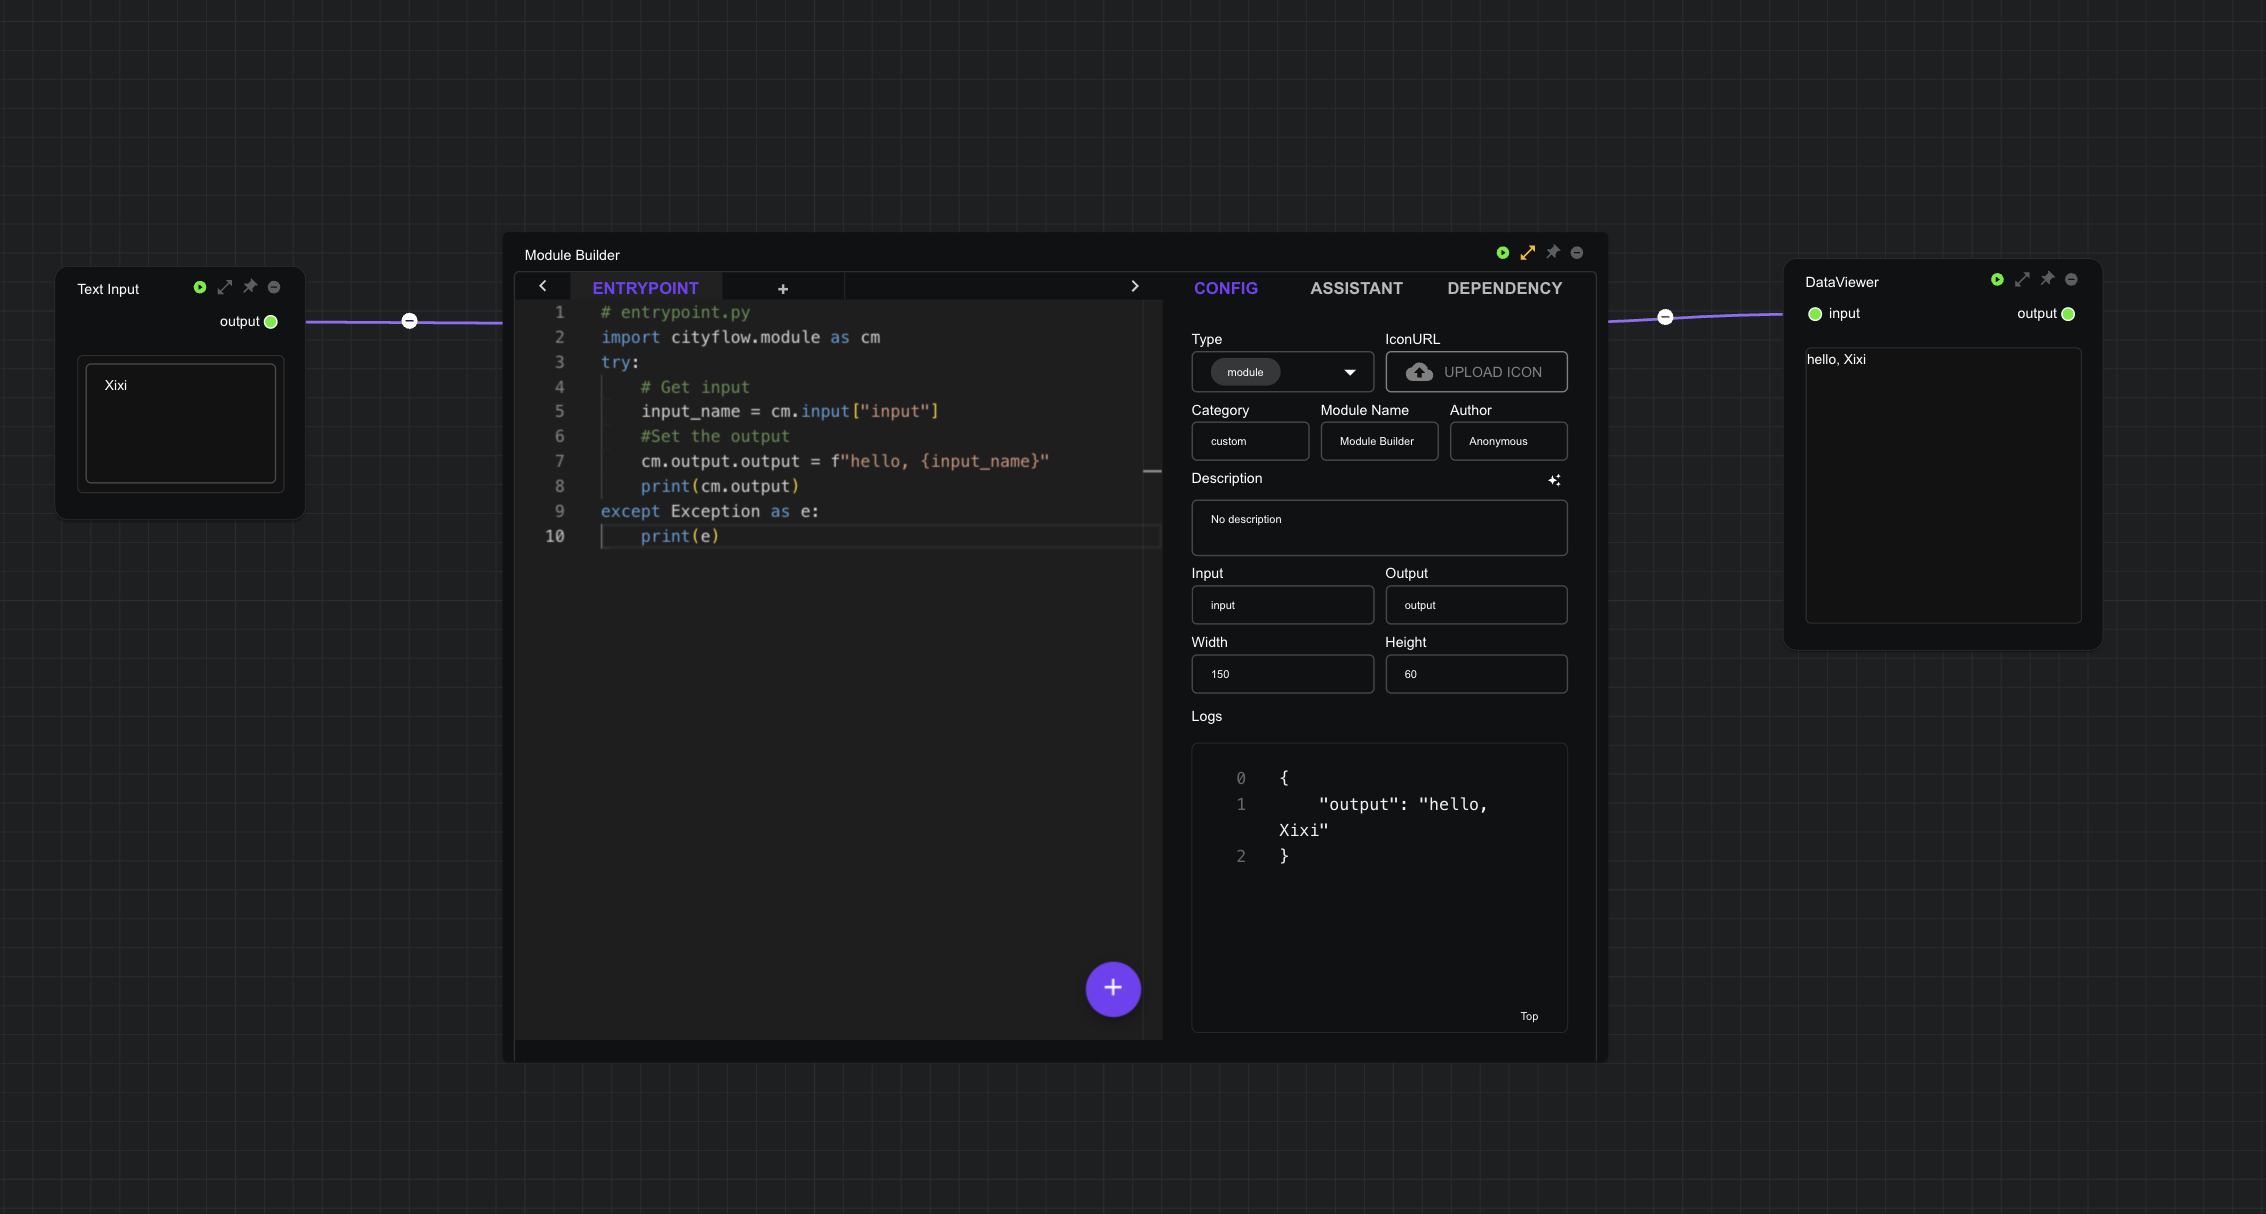
Create a Custom Module
-
Drag a new
Module Buildermodule from the left module list to the main interface. Connect the module's input to aText Inputmodule and the output to aData Viewermodule. -
Click the
expandbutton in the upper right corner to open the module settings interface. -
Click the module type dropdown menu and select the
moduletype. -
In the code editor, enter the following Python code:
# entrypoint.py
import cityflow.module as cm
try:
    # Get input
    input_name = cm.input["input"]
    #Set the output
    cm.output = f"hello, {input_name}"
    print(cm.output)
except Exception as e:
print(e) -
Click the run button on each module, enter a name in the input, and view the output information.
More information about building custom modules:
Create a Module Using AI
⚠️Note: To use the AI function, refer to the AI Assistant page for instructions on setting up the API KEY.
- In the
packagessection of the left initialization panel, enter the following information to installd3, then clickInit Environmentand wait for the installation to complete.
npm:
  - d3
-
Drag a new
Module Buildermodule from the left module list to the main interface, and click theexpandbutton located at the top right corner to open the module settings interface. -
Change the module name to
Bar Chart, and set the module width to 400 and height to 300. -
Click the
Assistanttab at the top right of the settings interface to open the module assistant. -
In the module assistant chat box, enter the request: "Create a bar chart module example using d3."
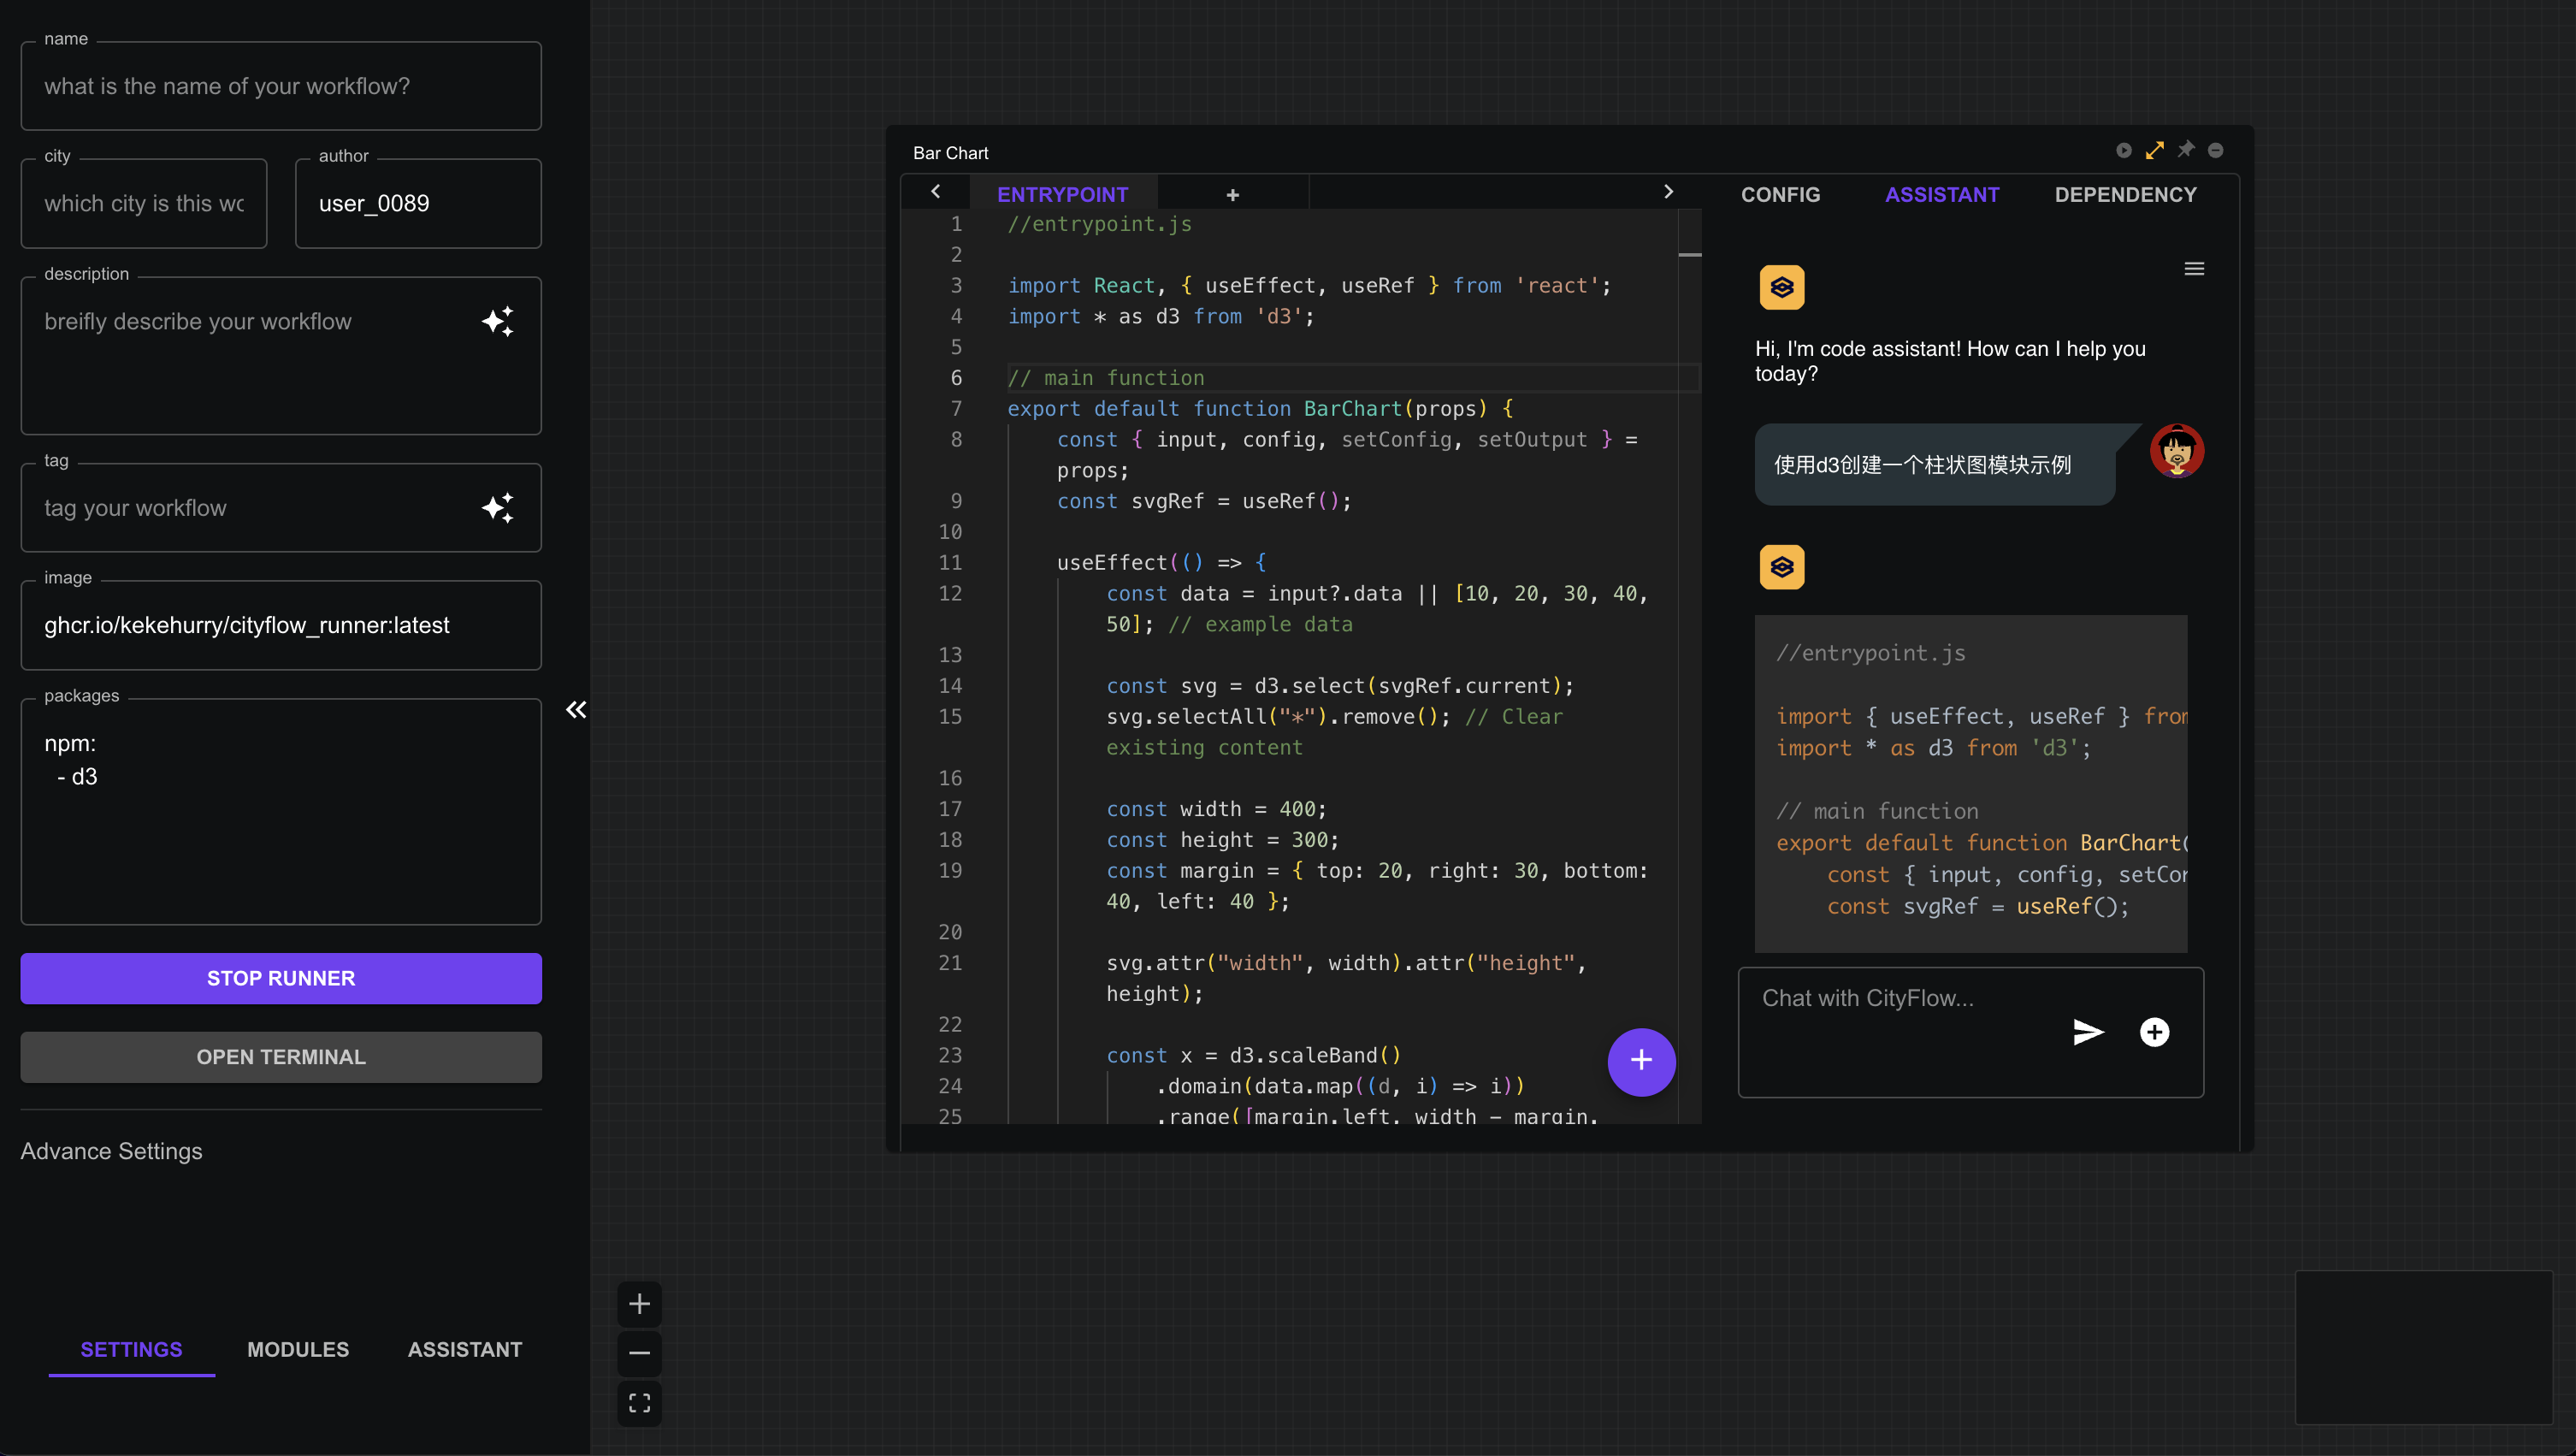
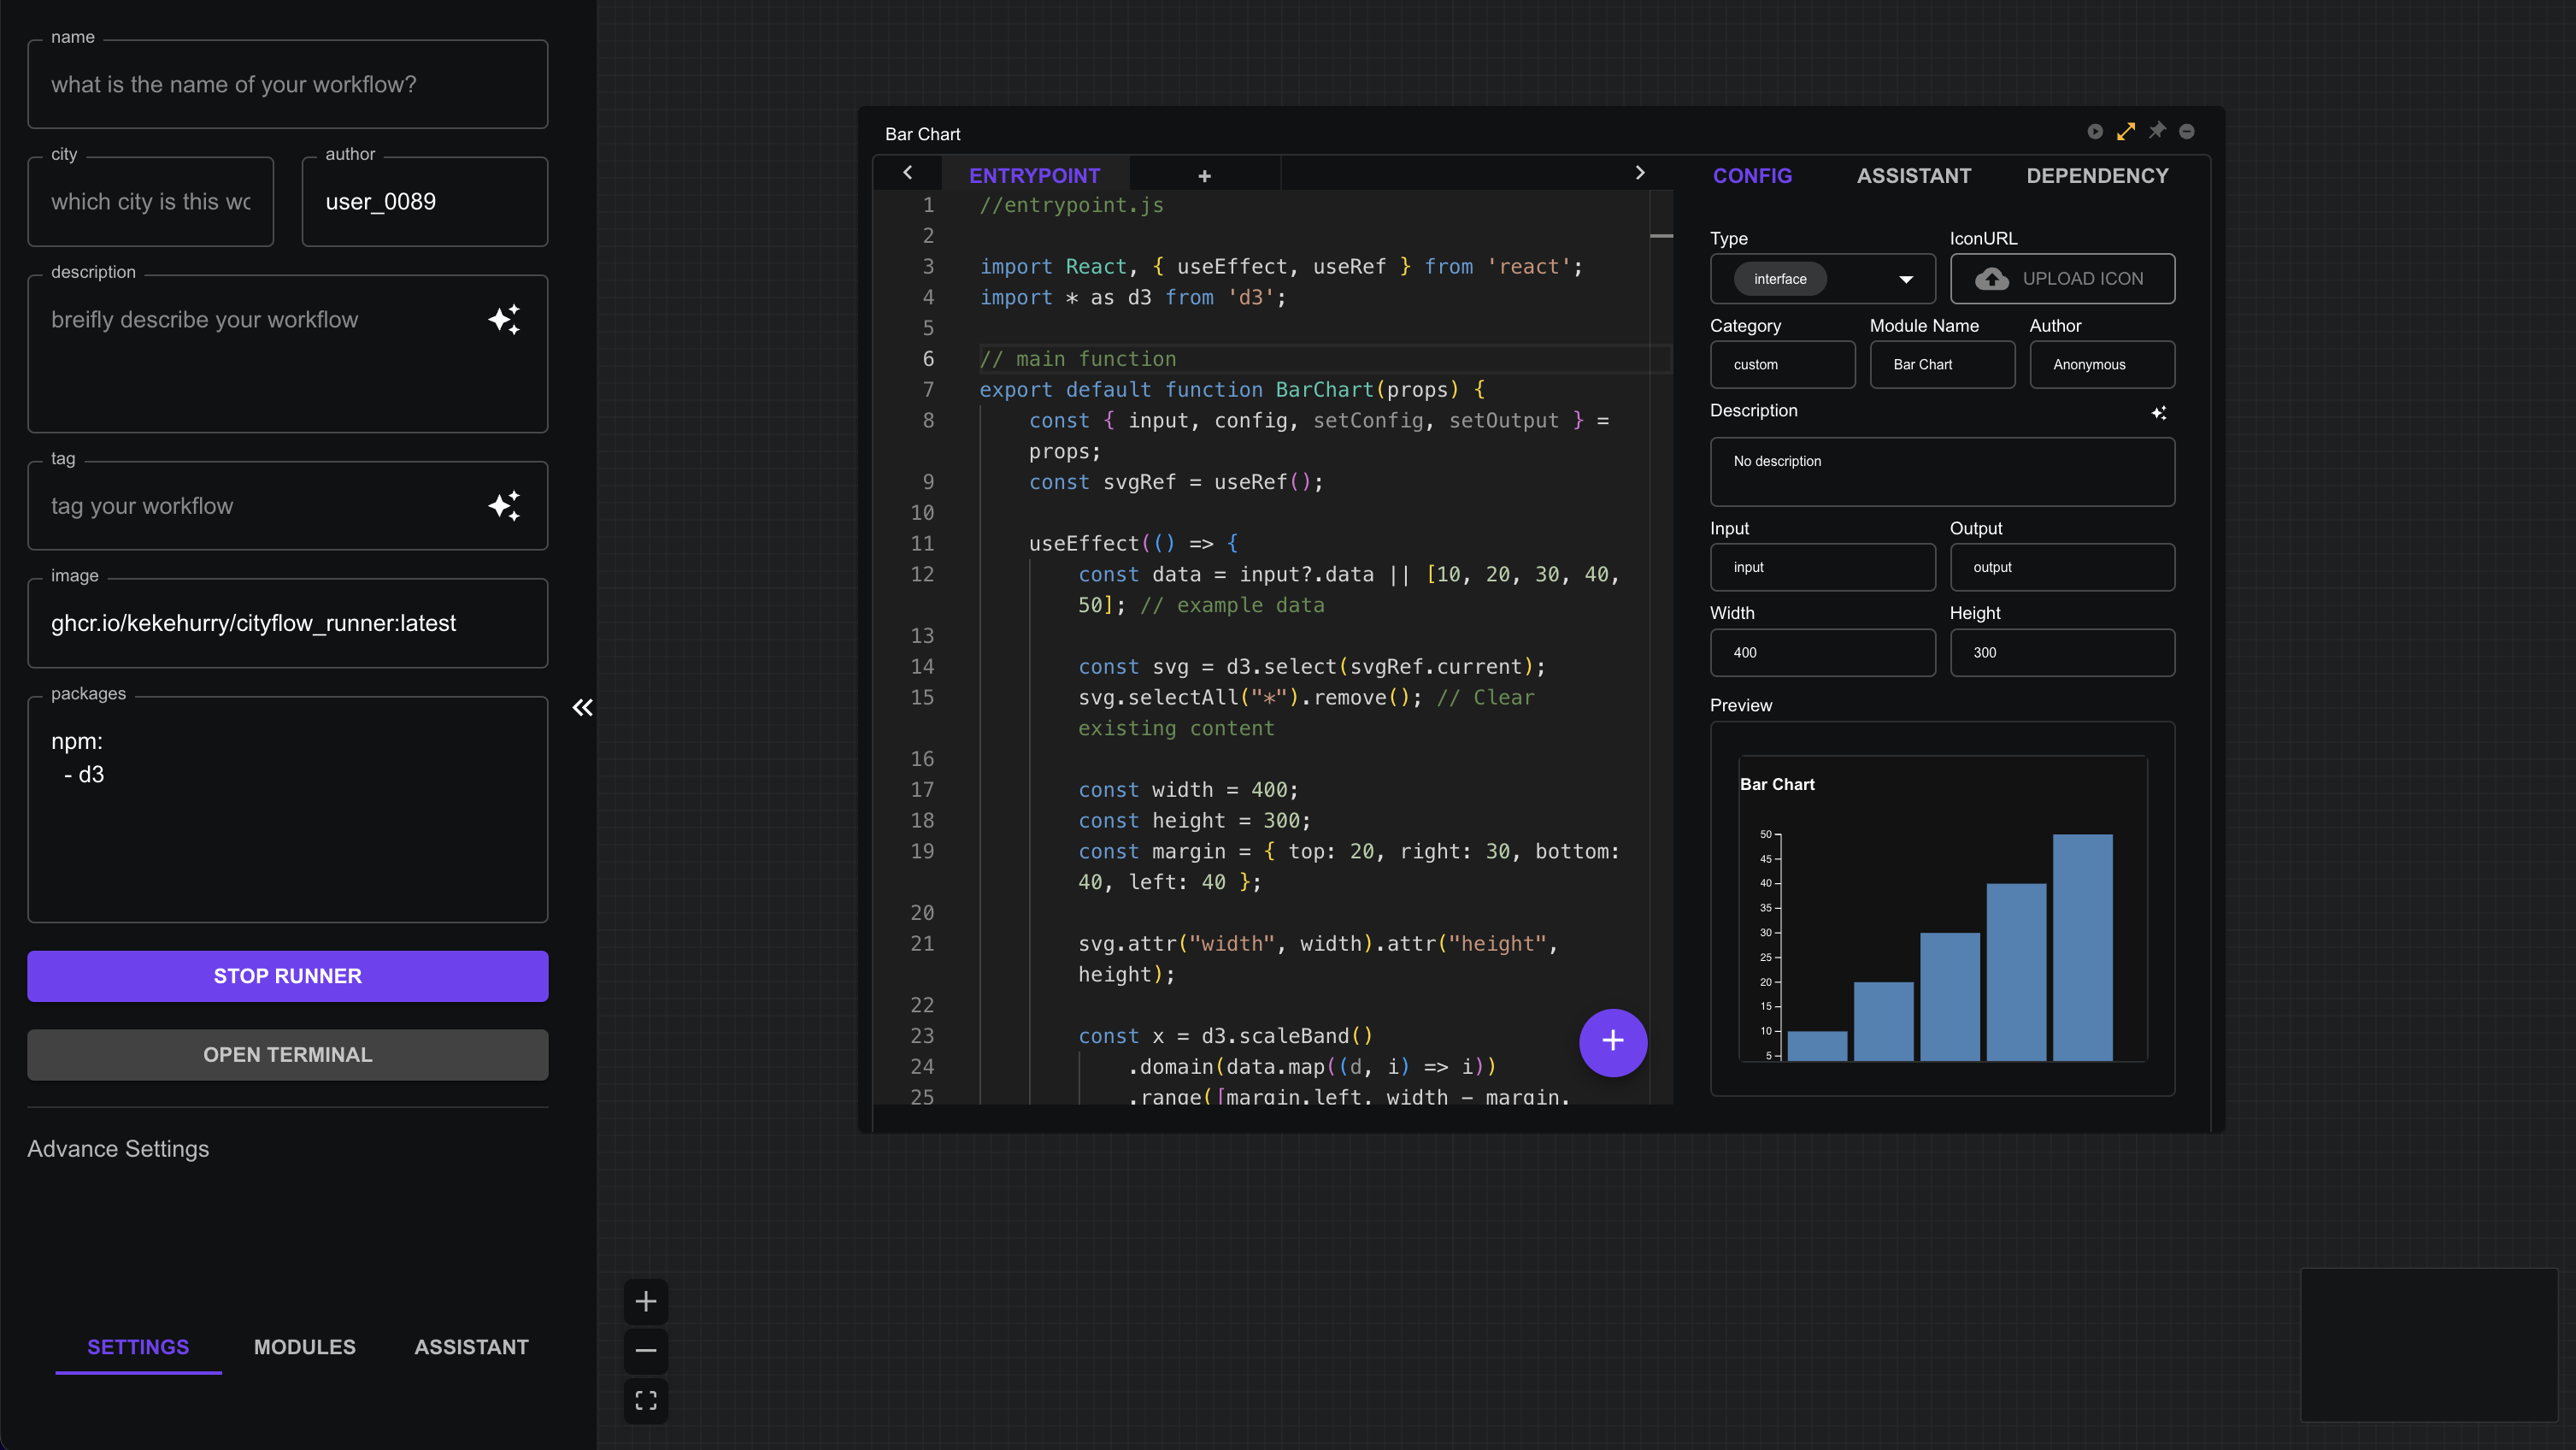
- After the code is generated, click the
Sendbutton below the code block to send the generated code to the editor. - Switch back to the
Configtab, click the '+' button to submit the code, and wait for the compilation to complete and preview the rendered result. - Click the
expandbutton to close the editing interface and view the new module.
Save & Share
Several methods for saving and sharing workflows in the CityFlow platform:
Ctrl+S: Save the current workflow to the database, which can later be viewed in the user interface (click theHomeicon).Savebutton: Click theCityFlow Logoicon at the top, selectSave, and save the current workflow to the database, which can later be viewed in the user interface (click theHomeicon).Downloadbutton: Click theCityFlow Logoicon at the top, selectDownload, and download all information of the current workflow into a JSON file. This file can be shared with others and later reopened viaUpload.Sharebutton: ClickShareat the top right to share the current workflow to the community, which can later be viewed in the community interface (click theCommunityicon).
Using Community Workflows
- Click the
Communityicon in the top toolbar to enter the community interface. - Select a workflow to open, and click the
Runbutton at the top right of the toolbar to run the community workflow.
Tips: When sharing a workflow, you can add parameters to the workflow URL to achieve different sharing effects:
demo=true: Directly opens the workflow display interface. For example:https://cityflow.media.mit.edu/flow?id=aba3472421b9bea8f0347ee350dd7b34&demo=trueembed=true: Embeds the workflow into another webpage. For example:https://cityflow.media.mit.edu/flow?id=aba3472421b9bea8f0347ee350dd7b34&embed=true.